Previously, we described how an iris camera captures an infrared image that contains the irises of a subject. In this blog post, we hit the high points on how a recognition algorithm finds, extracts and mathematically encodes the information from an iris into a compact iris code called a template.
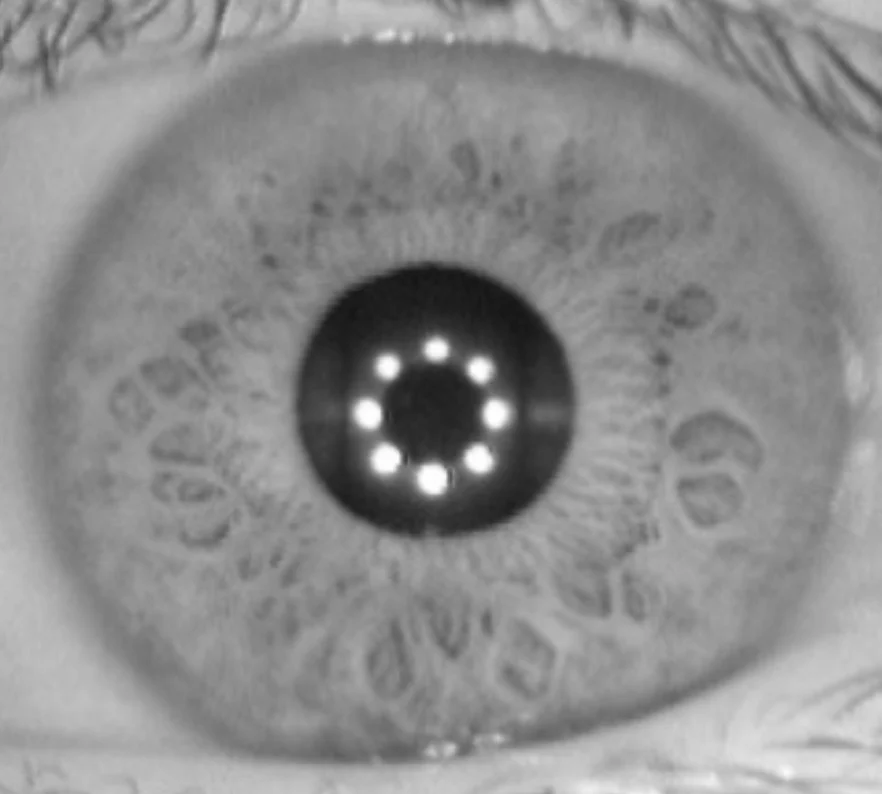
Figure 1: Infrared iris image close-up showing pattern of illuminators reflection on the subject’s cornea.
After capturing a subject’s infrared photo, an automated routine searches the image for the eyes of the subject. There are two preferred eye-finding methods. The first method outsources the task to a face recognition algorithm that returns the eye positions within the infrared photo. Using face recognition makes eye-finding easy and accurate but slow. A faster eye-finding method searches the infrared image for signatures of the infrared iris camera illumination system. If, for example, the iris camera uses a ring of eight infrared lights, the pattern of the eight illuminators will show up as an easily detected reflection on each cornea like in Figure 1. The second method even works when only a single iris is photographed but can mistake shiny jewelry or eyeglasses for eyes if they have cornea-like curvature. Rejection of non-eye objects can waste a bit of time.
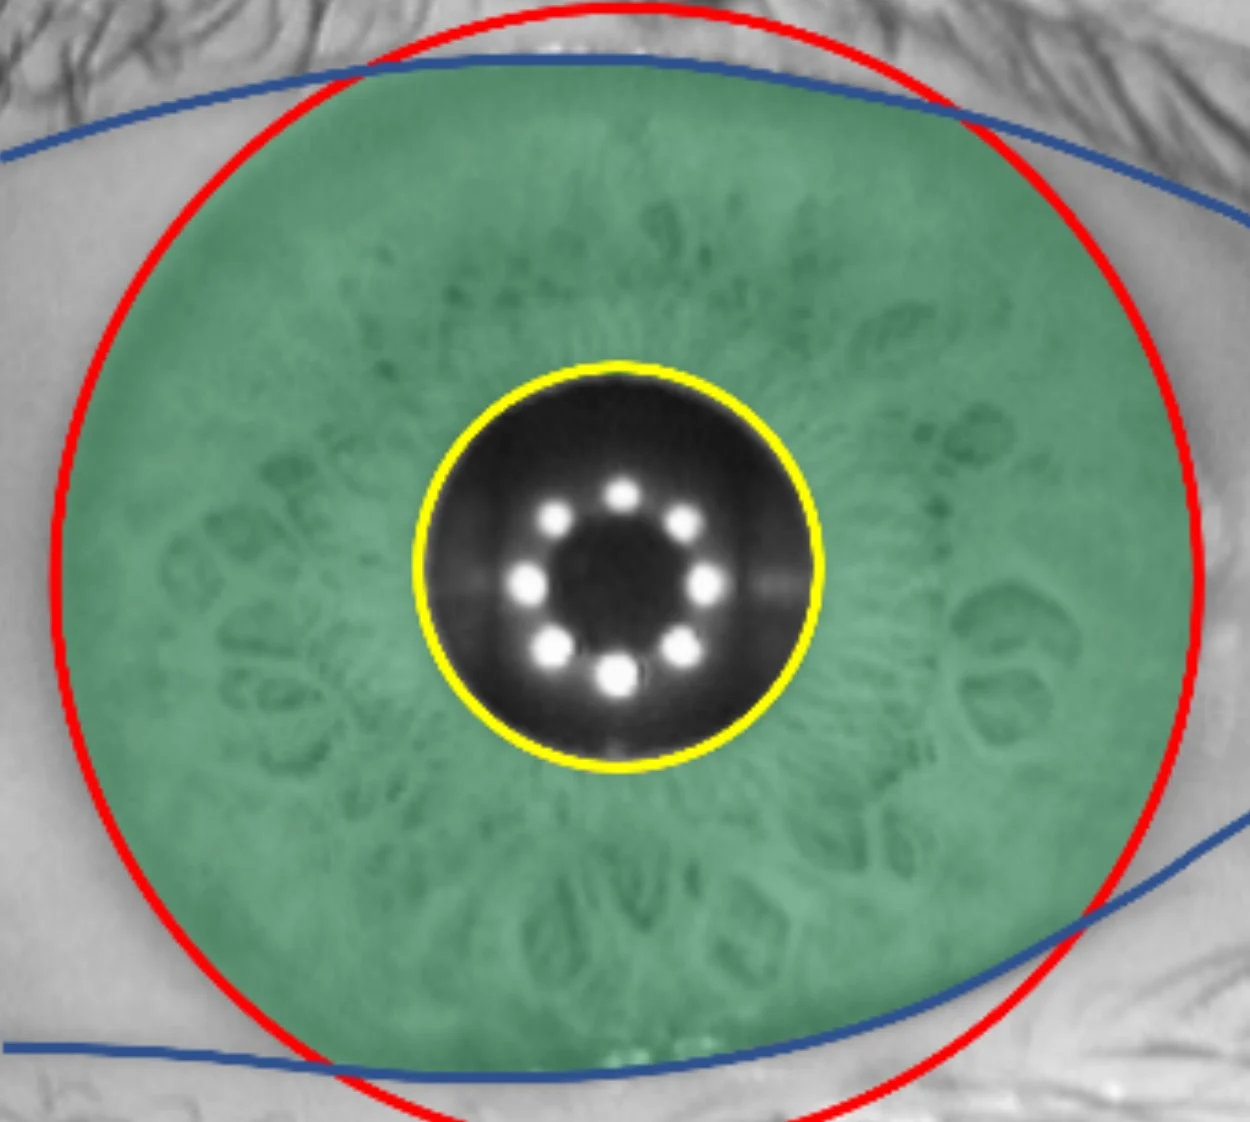
Figure 2: Iris texture (green tinted) delineated by pupil (yellow), sclera (red) and eyelid (blue) boundaries.
Either eye-finding method returns eye positions. Each iris is then cropped from the infrared image in preparation for the next task, isolating the iris texture itself from the rest of the found eye image. This segmentation task determines the iris-pupil boundary at the inner edge of the iris, the iris-sclera boundary at the outer edge of the iris and the upper- and lower-eyelid boundaries. Iris boundaries are shown by colored lines in Figure 2 while the iris texture that will be encoded is indicated by green tinting. Accurate segmentation is essential for accurate iris recognition. When eyelashes obscure parts of the iris texture, they must be masked out along with the other non-iris parts of the eye image.
Before the iris texture is encoded, it is stretched from its circular shape (with a pupil hole in the center) into a rectangular shape, an ingenious trick that makes all irises the same size and shape no matter how big or small the pupil. This process is called normalization. Without this normalization trick, your iris images outdoors under harsh sunlight with a tiny pupil and in a dimly lit room with a large pupil might not match one another. The normalization operation is easy to visualize. Imagine the green-tinted iris texture to be made of a flexible rubber sheet and removed from Figure 2 by cutting along the red and yellow lines. We then cut through the green-tinted iris texture from the rightmost part of the red line (at 3 o’clock) toward the left until we hit the yellow line. When the cut rubber sheet with iris texture is unwrapped and stretched into a rectangle, the top edge of the cut at 3 o’clock becomes the left side of the rectangle shown in Figure 3, while the bottom edge of the cut becomes the right side. The yellow iris-pupil line forms the bottom of the rectangle and the red iris-sclera line forms the top.
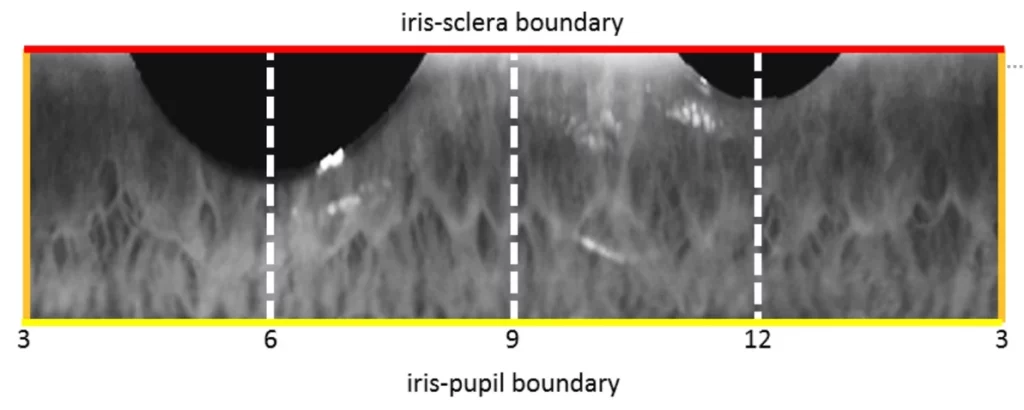
Figure 3: Iris texture stretched (warped) into a rectangle with the iris-sclera boundary on top and iris-pupil boundary on the bottom. Vertical lines labeled with ‘clock’ coordinates correspond to radial lines through the original iris texture. The black regions at 6 and 12 o’clock are the lower and upper eyelids respectively. Eyelids as well as eyelashes are masked out of the iris texture.
The normalized iris prepared as a rectangle is ready for division into small rectangular tiles, for example into 8 rows and 128 columns. Each tile contains a tiny region of iris texture. On the scale of a small tile, the total variation in iris texture is not too complicated and can be described using only 2 bits (four possible tile descriptions). If there are 8 x 128 = 1024 tiles and only 4 types of tiles, we need only 2k bits to describe any iris. That leaves room to create a second 8 x 128 mask that tells us when not to use a tile, for example, if it should be ignored because it is really part of an eyelid or has a reflection on it. The 2k bits needed to describe the iris and the 2k bits needed mask the unwanted tiles add up a form 4000-bit iris template, a very compact mathematical object that encodes a very complicated object. Because iris templates are very small, lots of them can be included in a database without taxing memory resources.
The last step in an iris recognition algorithm compares an unknown or probe template to a known, enrolled template or maybe to a long list of enrolled templates in search of matches between the probe and enrolled iris or list of irises. The comparison operation is a fast and efficient XOR operation that yields a match equals to the fraction of non-matching bits between the probe and an enrolled template. The operation is so fast that we have time to rotate the probe and retry the match to account for a subject who might have rolled their head one way in an enrollment and another way in a probe image.
In summary, to recognize an iris, we first find and crop irises from an infrared iris camera photo. We then carefully isolate or segment the iris texture from the cropped iris omitting the sclera, pupil, eyelids and eyelashes. The iris texture is warped from its circular shape into a normalized rectangular shape after which it is tiled into small regions that are encoded at 2 bits per tile. Unusable parts of the iris are masked. The encoded tiles and mask form an iris template that can be compared to other iris templates using a fast XOR operation that affords time to optimize rotational alignment. A single probe iris forms the input for matching against one or more enrolled irises. The output is a simple match score.
Amazingly, the likelihood of a false match of two properly segmented irises is astronomically low. Much lower that a false match of dissimilar faces and even lower than two dissimilar fingerprints. The method of iris recognition described here is credited to John Daugman who patented the scheme in 1994 including the transformation from round to normalized rectangle, the clever, compact, wavelet-based encoding at only 2 bits per tile and the highly efficient XOR template comparison. The scheme and variants are used by virtually all commercial iris algorithms today. Thank you, Professor Daugman.